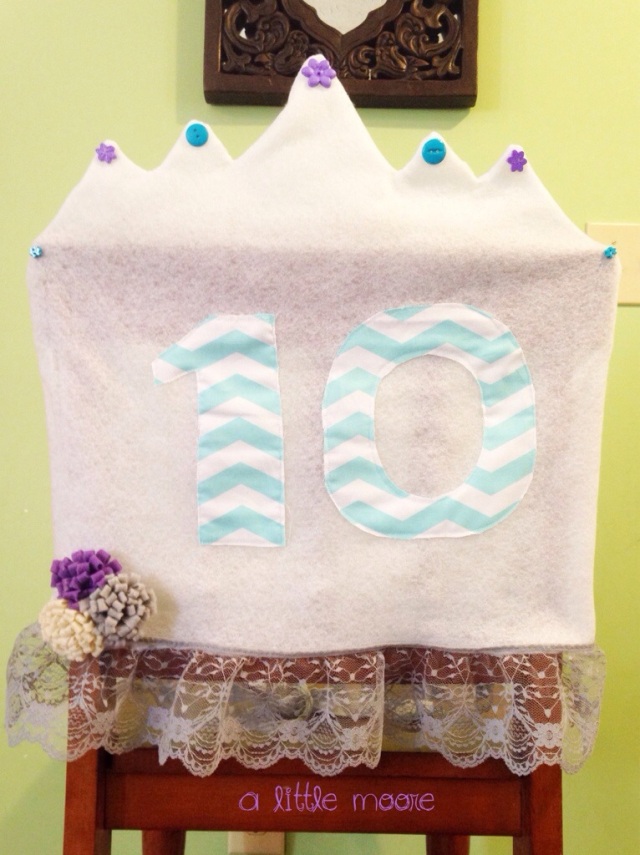
My little princess although still little on my eyes keeps growing up. We have a milestone birthday this week…TEN! I have been in such denial about it that I haven’t put as much thought into party planning as I normally do but today we settled on a theme…Frozen. Although she doesn’t want a heavy character themed party anymore we are using the pallet as inspiration! We are actually going tubing for big day so coming back from being actually frozen she deserves to come home to a throne.
To make this measure your chair and cut out 2 pieces of felt leaving an 1 inch seam allowance on both sides.
I made a template and used it as my crown guide.
My felt was left over from Christmas clearance at Target in would suggest using a more sturdy felt for your project!
Next I cut out her birthday numbers. Just free handed them. If you are feeling fancy feel free to print out a template.
Place them on carefully. Mine stuck I pretty well but you may need to pin yours down or use a little spray adhesive to keep them in place. Next stop, your sewing machine!
Sew your numbers on first and then turn inside out and get ready to add trim! I found gray lace trim at Hobby Lobby and it didn’t work out for another project but it is the perfect finishing piece for this! Since it is felt there is no need to see off your bottom neatly but a little border like ribbon or ric tax would be cute too!
Lastly I used hot glue as button jewels for the top of my crown. It needed something else so I whipped up a few felt flowers. I am guest posting how to make those at A Bird and a Bean this weekend!
Easy to customize and the perfect addition for birthday parties! I love how this chair cover turned out!


awwww this is just too cute! What a way to make your little one feel special! We have a special plate and table cloth, but I love this idea.
She did feel special! I wish I would have thought of it before she turned 10!
That is super cute for a birthday party! I am so not crafty, but it would be great to have the base and just be able to change the numbers each year. I love it.
Great idea! I love the interchangable aspect!
I love your Birthday Chair Cover Tutorial – not crafty enough to make it but it would be great to purchase 🙂